The most economical way to transform a room is by using paint. Whether it is used as a SPLASH of color or in full scale it WILL MAKE A HUGE difference in how your room "feels" and "looks". Below I reveal MY favorite impressive paints. I bet that at least ONE of them (if not all) will IMPRESS YOU. Here they are:
Chalkboard Paint!
This is my latest FAVORITE! I am a firm believer that ADULTS can have FUN TOO which is why I like using chalkboard paint to modernize a look "in an unconventional way". All you need is to prime the wall 1st, then paint away, let dry and HAVE FUN WRITING ON THE WALLS. Chalk is easily removable with paper/water or an eraser board.
Magnetic Paint!
What is AMAZING about this paint - well apart from transforming your wall into a magnetic surface - is that the magnetic paint is actually the primer; therefore you can select your own paint (whatever color your heart desires) as the top coat. How COOL is THAT! Go to www.kling.com for more information.
Metallic Paint!
How luxurious would the color of pearls look on your wall. Well, now you can EASILY achieve it! Ever dream of having an area with the colors & shine of gold, bronze, copper, and silver? Well now you can! Go to http://www.benjaminmoore.com/ for more information.
Milk Paint!
Yes, you read correctly. The ingredients (now don't try to brew this at home!) are milk/cottage cheese, lime, and earth pigment. The paint is intended to be applied to wood. It is environmentally safe, weather resistant, has no harmful odors, and easy to clean up. How impressive is THAT! Want more information? Go to http://www.realmilkpaint.com/ for more information. GOT MILK?
Did I win the bet? Did I surprise and impress you with the paint selection? Remember there are TONS of unique paint & painting techniques to use! I strive to always present my clients with unique painting ideas and I would be happy to help you as well.
Remember, live BEAUTIFUL and COMFORTABLE!
About Author:
Ada Gonzalez is the creative director of Ada's Interior Design, Inc. in New York. She designs solutions that provide comfort & function with a BIG SPLASH of style without having to spend hi-end prices on furniture & furnishings. Her designs have appeared in the Life & Style section of The Journal News and the Lohub Blog of Westchester County. In April 2007 she won a design competition called "Interior Motives". She was an Interior Decorating subject specialist for DETC (Distant Education Training Council) spring 2007. Her weekly newsletter called “Smart Decorating! E-News” is her way of reaching out and sharing decorating tips to people across the United States. To get more information go to http://www.adasdecoratingsolutions.com/
Article Source: http://www.articlesbase.com/
Featured Video:
Metallic Venetian Plaster
Custom design your walls with metallic Venetian plaster. Watch Sandra Kiss London of Faux Like a Pro show you how to use Venetian plaster in lieu of traditional house paint. Go to www.Fauxlikeapro.com for more ideas.
Tuesday, April 22, 2008
Wednesday, April 16, 2008
Painting Business - 3 Great Ways To Make Fast Cash in the Painting Business
Have you been looking for a business to start? A simple way that you could make some fast cash? Have you been wanting your own painting business but you don't want to quit your job and possibly go broke?
Have you thought about a painting business where you could do some small side-jobs each month to help your house payment and pay the bills? Maybe you are looking for something better, but hey, this is a good start profit-wise!
Maybe you are working mostly at home right now and you could use an extra $1,000 a month to pay the bills so you can continue to work at home the rest of the time.
If so, listed below are three great ways that you can start your own painting business and make some red-hot immediate income on the side. This is also a great way to learn the trade before going into it full time.
I started my own house painting business in 1991. Since then I have learned quite a bit about interior and exterior painting. I also learned quite a bit about drywall repair. If you know how to get customers and how much to charge, the rest can be learned as you go. When I first started out I ate quite a few jobs because I didn't know how much to charge.
Today I can actually make more money in a day and a half painting than I did all week long at my last regular full-time job. And it's fun to be able to relax and enjoy your work knowing that you are going to get paid well for it.
I have listed below three easy to start, low-cost businesses that revolve around my painting trade. Each one can make you a quick $300 - $500 for just a few easy hours work and over a thousand a week if you wish. The reason I tell you about these 3 business ideas listed below is because I know them and they make me money. These are 3 proven profit makers that you too can specialize in.
#1 Residential/Commercial Painting Business: If you love to paint this is a handy service you can render for the busy homeowner and business owners as well. Many wives don't let their husbands go near a paint brush. Many customers hate to paint and would rather pay someone else to do it for them. I started my painting business with just a few basic painting tools and a beater car. My business over the years has given me good immediate income whenever I need it.
#2 Faux Painting Business: If you like faux painting, you can take on small jobs here and there. Get yourself some basic faux painting tools and a 2' x 3' sheet of plastic to practice different patterns on and you will get the hang of it fast. If you like this type of painting business you could get small one or two-room jobs per week and make a thousand dollars per week even. Faux painting offers high profit margins if you get good at it.
#3 Drywall Repair Business: Drywall repair goes hand-in-hand with a painting business. You can easily charge $300 - $500 doing simple small repairs like water damage and texturing.
As an example, I just finished a small repair job for a total of $335. It took me an hour and a half the first day and the second day took 6 hours. Not too bad a wage for only 7 1/2 hours work. $10 of the money went for fuel, another $3.50 for a roller cover because I painted it up one fast coat. I used maybe $2 worth of drywall compound in the quick-dry formula. So I netted about $320 or $40 per hour labor.
You may also get small jobs hanging sheets of drywall. A customer might have a basement or garage that they need drywall hung in. They will want you to tape and finish it as well. You will most likely get asked to do the painting also and this can double your profits.
So there you go. 3 easy low-cost, time-proven ways you can start a painting business or painting-related business. All of these variations can be started for less than $500. If you did just one small job a week it could mean an extra $300 - $500 or $1200 - $2,000 a month extra income.
About Author:
Lee Cusano has owned and operated his own successful painting business since 1991. He has also helped many others to start their own painting business with his "Paint Like a Pro Estimating and Advertising CD-ROM". Lee also offers a free report titled "How To Gain a High Success Rate For Getting Painting Jobs". To get it go to http://www.Painting-Business.com
Article Source: http://www.goarticles.com
Tuesday, April 15, 2008
Faux Painting Tips and Ideas
Faux painting tips
Faux painting is a very convenient form of painting the interiors of the house which not only is do it yourselfer type of work but also adds an exceptional look to the entire room. It’s a great way of creating a soothing and pleasant atmosphere around the room. Faux painting can be done with many techniques such as sponging, rag rolling, dragging etc depending upon the type of the surface. Each technique has its own individual specialty and needs that extra tools and materials. Faux painting can be easily learned over the internet from the all the online faux painting schools and one can also have a professional degree by doing a course on faux painting. These schools help the student learn faux painting in the easiest possible way so as to help them do all the future painting in and around the home by themselves.
General materials and tools needed
In order to have a basic project of faux painting one need the normal tools which are required for almost all the techniques. The following is the list of all the materials needed for undergoing a basic faux painting project:
* Paint tray
* Lint free rags
* Rubber gloves
* Painters tape
* Zinsser products such as Blend and glaze etc.
General tips on faux painting
The following is a in general list of tips which would be very helpful in performing a faux painting project in a most simple but sweet way:
* The surface should and must be prepared very properly before starting to decorate it.
* The experimentation should be done first on a sample board rather then directly approaching the wall.
* The work should be divided into small sections. One wall or section should be completed stopping at the corner or the natural break.
* The work should be done very quickly well in time before the glaxe becoming tacky may be around 10 to 15 min. In case of performing negative applications a thick wet edge of unworked glaze should be left at the end of each section to help allow the blending of the next one.
* The use of protective gloves is often recommended while glazing for easy clean up.
* The use of lint free rags such as funnels, diapers, cheesecloth or sheets would be advisable.
In this way following the above tips very sincerely one can get outstanding results from a simple faux painting project.
Faux painting ideas
Faux is a French word for the word ‘false’ or ‘fake’. So we can say that this painting is all about false illusion. It creates an illusion of depth and complexities to the painted walls, doors, and ceilings. Till now we have come across popular effects achieved by faux painting in a stone, parchment, and in an antiquarian. Faux finishing provides a variety of interesting techniques that gives depth and personality to walls and other objects. In other words, we can say that it provides life to the non living things also. Faux painting can be both simple and a complex one. It provides a purpose to everything whether it is wood, marble or leather. It is less expensive alternative for using natural materials. It is a unique style whether it is done by any individual or a professional. Through layering of paints and glazes done by hand it provides the surface appear to be something it is not. It is the easiest and creative outlet for people who are interested in arts and is a wonderful medium for experimentation.
Implementation
Though faux is applied to any kind of surface but it generally involves wall preparation and repair, one or two base layers of paint, one or more coatings of a complementary glaze and paint mix, and a topcoat that acts as sealer and protectant. But it is not so that it is only limited to walls, it is also useful for revitalizing furniture or cabinets and adds appeal to walkways or other concrete structures. Faux paintings are applied for bare walls. Before one get out the sponge the wall should be ready and clean so that one can give a background color to it. Light colors are always ideal as a background as they show through the overlying paint to some degree and help in creating a sense of depth or roughness. Experienced painters recommend the background to be painted with semi-gloss or satin paint as most of the faux paints dry slowly on slightly slick backing surface which tends to heighten the desired effect.
Suitability
Faux paining is also suitable for children. Even small children can do this faux painting. This can be done by anyone as it is very easy to do. It can be done by anyone like the housewives, children and the old people.
About Author:
Jamie is the author of other Faux Tips located at Home Improvement Tips Also check out our Home Improvement Tips Blog for other Tips. Please stop by and sign up for our free home imporvement tips news letter.
Article Source: http://www.articlejoe.com/
Saturday, April 12, 2008
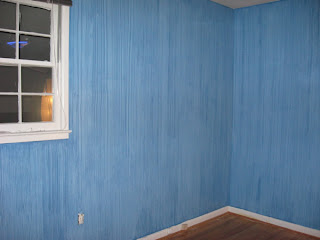
Mount Vernon Faux Painting Project - WallDreams.com
WallDreams latest project was in the Mount Vernon area, near George Washington's home. The following pictures are of the master bedroom and office, which were both faux painted by WallDreams. The bedroom was done in a parchment effect, 2 glazes applied with cheesecloth over a lighter basecoat and the office was was finished in a strie, or dragging technique of a deeper blue glaze over a light blue basecoat.
The master bedroom:


The office, light blue basecoat:


If the technique had been applied in two directions (and with the addition of using a check roller tool), it would take on more the appearance of denim.

Til next time,
Donna of WallDreams
The master bedroom:


The office, light blue basecoat:


If the technique had been applied in two directions (and with the addition of using a check roller tool), it would take on more the appearance of denim.


Til next time,
Donna of WallDreams
Friday, April 11, 2008
Latest Photos From WallDreams Project - Mount Vernon
From strie to parchment to metallic paint and stripes, WallDreams latest project has it all. Located in the Mount Vernon area, just a few steps from our first President's home, this house was enhanced with several faux painting techniques. Very bold color choices - they love it! And the so do I! It was a pleasure to work with this young couple and make their new house a home.
2 before photos, though a basecoat for some of the metallic paint has already been started:


And the reveal:
Metallic Copper in the living room and in the stripes of the dining room along with a pearl paint.


Til next time, keep those brushes clean,
Donna of WallDreams
2 before photos, though a basecoat for some of the metallic paint has already been started:


And the reveal:
Metallic Copper in the living room and in the stripes of the dining room along with a pearl paint.


Watching the blue herons, geese, ducks, hawks and a certain chatty red wing blackbird from their exceptional living and dining room view will be a pleasure for the new home owners for years to come. I will add the photos of the office and master bedroom tomorrow.
Til next time, keep those brushes clean,
Donna of WallDreams
Monday, April 7, 2008
Paint Rollers - Cut Any Room Down To Size
When you stare at a wall in a big room, armed only with a paint brush, you probably feel seriously overwhelmed. Luckily, there is a tool that makes the task much less terrifying - the versatile, amazing paint roller. Paint rollers allow people to drastically reduce the amount of time it takes to paint a large, flat surface, like a wall with few windows or a ceiling.
Most people don't realize that there are any options beside the cheap DIY grade paint roller handles that can be found in almost any big box store. They apply paint to the wall just fine, especially if the DIYer springs for the nicer roller covers. However, cutting in around windows and getting paint into corners is just plain impossible with these rollers. Still there are ways around this problem. You can cut in with a brush first and then go back and roll the rest of the walls.
Recently, I discovered a trick the pros use - a professional paint roller. Those little plastic end caps that keep the rollers from getting into the corners are missing on these rollers. That means that you need to do less cutting in and you can avoid using the brush to paint corners all together. However, you'll still need to paint the area where the wall connects to the ceiling and crevices that are too tight for the roller to get into by hand. If your baseboard trim is already installed, you may also want to cut in around the baseboard with a brush, too.
When you shop for a paint roller handle and covers, you should start by thinking about the job you are buying them for. The traditional short roller is fine for normal walls. If you are doing a cathedral ceiling, though, you may want to look for a rod extension. This extension screws into the handle and makes it much easier to reach higher spots.
Next, think about the texture on the walls. There are covers that work better with different wall surfaces. For instance, popcorn finishes need a roller that can handle that rough, uneven surface without falling apart and there are special roller covers for this type of wall.
You can also find covers that create a pattern. These covers make certain faux painting techniques much easier, since rolling is so much quicker than stenciling or freehand painting a design.
About Author:
Niall Roche - Painting a huge wall in any home can be a scary task. Painting rollers make that scary task a thing of the past. Click on over to PaintSplashes.com for more interior painting tips and ideas.
Article Source: http://EzineArticles.com/
 WallDreams Paint Ideas!
Paint Rollers and Covers 101
Cheapie covers are made with a cardboard roll inside and usually spatter paint profusely, while quality covers have a plastic roll.
A paint roller is the frame and handle that holds the roller cover. The most common size is the 9" and quality rollers are worth their investment. Some will easily release the cover by tapping the frame which is quite convenient.
3" to 4" trim roller - good for narrow areas.
Nap or pile - the length of fiber on the cover.
Synthetic covers - oil-base paint and primers.
Lamb's wool covers - water-base paint and primers.
Mohair covers - smooth surfaces, oil-base enamels, all paint types, varnish.
1/8" to 1/4" Short Nap: very smooth surfaces, enamels, gloss
3/8" to 1/2" Medium Nap: semi rough surfaces, latex, flat paints
3/4" to 1-1/4" Long Nap: rough surfaces, stucco, brick, block
Specialty roller covers:
Stippling - unique marking of paint and textured paint
Foam - smooth and textured available.
Fabric - good for rag rolling faux technique.
Stenciled - foam or rubber patterns, double roller available for blending two colors at once.
Roller cover prep - before using, roll the cover across tape to remove loose fibers.
Til we paint again,
Donna of WallDreams
Most people don't realize that there are any options beside the cheap DIY grade paint roller handles that can be found in almost any big box store. They apply paint to the wall just fine, especially if the DIYer springs for the nicer roller covers. However, cutting in around windows and getting paint into corners is just plain impossible with these rollers. Still there are ways around this problem. You can cut in with a brush first and then go back and roll the rest of the walls.
Recently, I discovered a trick the pros use - a professional paint roller. Those little plastic end caps that keep the rollers from getting into the corners are missing on these rollers. That means that you need to do less cutting in and you can avoid using the brush to paint corners all together. However, you'll still need to paint the area where the wall connects to the ceiling and crevices that are too tight for the roller to get into by hand. If your baseboard trim is already installed, you may also want to cut in around the baseboard with a brush, too.
When you shop for a paint roller handle and covers, you should start by thinking about the job you are buying them for. The traditional short roller is fine for normal walls. If you are doing a cathedral ceiling, though, you may want to look for a rod extension. This extension screws into the handle and makes it much easier to reach higher spots.
Next, think about the texture on the walls. There are covers that work better with different wall surfaces. For instance, popcorn finishes need a roller that can handle that rough, uneven surface without falling apart and there are special roller covers for this type of wall.
You can also find covers that create a pattern. These covers make certain faux painting techniques much easier, since rolling is so much quicker than stenciling or freehand painting a design.
About Author:
Niall Roche - Painting a huge wall in any home can be a scary task. Painting rollers make that scary task a thing of the past. Click on over to PaintSplashes.com for more interior painting tips and ideas.
Article Source: http://EzineArticles.com/
 WallDreams Paint Ideas!
 Paint Rollers and Covers 101
Cheapie covers are made with a cardboard roll inside and usually spatter paint profusely, while quality covers have a plastic roll.
A paint roller is the frame and handle that holds the roller cover. The most common size is the 9" and quality rollers are worth their investment. Some will easily release the cover by tapping the frame which is quite convenient.
3" to 4" trim roller - good for narrow areas.
Nap or pile - the length of fiber on the cover.
Synthetic covers - oil-base paint and primers.
Lamb's wool covers - water-base paint and primers.
Mohair covers - smooth surfaces, oil-base enamels, all paint types, varnish.
1/8" to 1/4" Short Nap: very smooth surfaces, enamels, gloss
3/8" to 1/2" Medium Nap: semi rough surfaces, latex, flat paints
3/4" to 1-1/4" Long Nap: rough surfaces, stucco, brick, block
Specialty roller covers:
Stippling - unique marking of paint and textured paint
Foam - smooth and textured available.
Fabric - good for rag rolling faux technique.
Stenciled - foam or rubber patterns, double roller available for blending two colors at once.
Roller cover prep - before using, roll the cover across tape to remove loose fibers.
Til we paint again,
Donna of WallDreams
Sunday, April 6, 2008
Getting the Baby Nursery Walls Ready
When planning your baby nursery, deciding on paint colors and then preparing and painting the walls is a major part of the design process. You will want to choose paint colors that go well with the theme or design scheme that you have decided on for your baby’s nursery. The best way to do this is to take a piece of the nursery bedding to the paint store with you to pick out paint samples. You may want to bring home the samples you choose to see how they look in the room. Sometimes the room’s lighting will affect how the colors look, so doing this may save you the trouble of repainting the room if you are unhappy with the results.
If time allows, it is best to paint the nursery at least a month or two before the baby is expected. This allows time for the room to air out. You may also want to consider choosing paint that has no or low VOCs (volatile organic chemicals). These types of paints may cost more but it is worth the additional cost since they will omit little or no fumes unlike normal paints.
If you want to get creative when painting the walls, you can try faux painting techniques such as sponging and ragging. Another idea is to stencil designs on to the walls that match the theme you have picked for the room. If you have an ocean theme, fish stenciled on the wall would look really cute. You can buy all the supplies you would need for stenciling or faux painting at your local home improvement or paint supply store.
Of course, you are not limited to paint when deciding what to do with the baby nursery’s walls. Wallpapers, wallpaper borders, and murals are all great options for the nursery walls. Wallpaper and border can sometimes be found to coordinate with your chosen nursery theme. Sports, airplane, nautical, animals, Precious Moments, and Winnie the Pooh are just a few of the themes that you should easily be able to locate wallpaper or borders for.
If you want to go with a wall mural for your baby nursery, there are several routes you can take. You can purchase a mural that can be put on the wall the same way wallpaper is. You just assemble the mural piece by piece like applying wallpaper. Another option available is paint by number mural kits that you paint on yourself. If you don’t want a mural that covers the whole wall, peel and stick decals are a great option. You can often find them to match many nursery themes. The last option is to have a muralist paint the mural. This can be quite pricey though unless you or someone you know is a gifted artist and able to do it.
Whatever you decide to do with your baby room walls, remember to take into consideration what you plan to do with the rest of the room’s décor. Having walls that complement the room’s theme and design will bring the whole room together.
About Author:
Rebecca Johnson is the owner of several websites including Decorating-Your-Baby-Nursery.com which covers all aspects of planning a baby nursery and Las Vegas Wedding Informer which provides Las Vegas wedding planning information.
WallDreams Paint Ideas!
Awaiting A Baby, A Room With A View To Grow In
While counting down the months and days until the new little person arrives, how to decorate the nursery is on your mind. We’ve all seen the typical pink for girls and blue for boys which of course may need to change for the next child, and/or may only work for the first few years.
Why not play up the nursery to be a space for them to live and learn in? A mural can be done ranging on many themes, for instance:
The circus (leave off the clowns if they don't thrill you)
A jungle
The zoo
Nursery rhymes
Favorite cartoon characters
Cars, trucks, fire engines with little paved roads
Teddy bear picnic
Garden party
Tea party
Forest theme
Island theme
Farm animals
Boats, sailing, surf boarding
Princess (baby girl's name as "Princess Mary")
Puppies and kittens (any baby animals)
Clouds
Under the sea
Noah's ark
Cowboys
Butterflys, bugs, birds
Wizard of Oz
Winnie the Pooh
Sports - baseball, football, etc
Building blocks
Legos
Airplanes, rockets
Space, stars, moon
Kid games boards
As you see the list can go on and on. Children's rooms are a lot of fun just coming up with ideas to do!
Some nice neutral colors will see the room through the births of several children and a soft faux finish will give a room character as well.
Paint colors coordinated with the child’s toys makes the whole room balanced – the toys are part of the decorating scheme.
Chalk board paint in a section for mini artists.
For mommies to be - do not use oil paints yourself and better yet, leave the house while any painting is being done.
By the way, congratulations and best wishes for you and your new baby! Have fun creating a great baby room that will see the child through the first phases of their lives.
Keep those brushes clean,
Donna of WallDreams
If time allows, it is best to paint the nursery at least a month or two before the baby is expected. This allows time for the room to air out. You may also want to consider choosing paint that has no or low VOCs (volatile organic chemicals). These types of paints may cost more but it is worth the additional cost since they will omit little or no fumes unlike normal paints.
If you want to get creative when painting the walls, you can try faux painting techniques such as sponging and ragging. Another idea is to stencil designs on to the walls that match the theme you have picked for the room. If you have an ocean theme, fish stenciled on the wall would look really cute. You can buy all the supplies you would need for stenciling or faux painting at your local home improvement or paint supply store.
Of course, you are not limited to paint when deciding what to do with the baby nursery’s walls. Wallpapers, wallpaper borders, and murals are all great options for the nursery walls. Wallpaper and border can sometimes be found to coordinate with your chosen nursery theme. Sports, airplane, nautical, animals, Precious Moments, and Winnie the Pooh are just a few of the themes that you should easily be able to locate wallpaper or borders for.
If you want to go with a wall mural for your baby nursery, there are several routes you can take. You can purchase a mural that can be put on the wall the same way wallpaper is. You just assemble the mural piece by piece like applying wallpaper. Another option available is paint by number mural kits that you paint on yourself. If you don’t want a mural that covers the whole wall, peel and stick decals are a great option. You can often find them to match many nursery themes. The last option is to have a muralist paint the mural. This can be quite pricey though unless you or someone you know is a gifted artist and able to do it.
Whatever you decide to do with your baby room walls, remember to take into consideration what you plan to do with the rest of the room’s décor. Having walls that complement the room’s theme and design will bring the whole room together.
About Author:
Rebecca Johnson is the owner of several websites including Decorating-Your-Baby-Nursery.com which covers all aspects of planning a baby nursery and Las Vegas Wedding Informer which provides Las Vegas wedding planning information.
WallDreams Paint Ideas!Awaiting A Baby, A Room With A View To Grow In
While counting down the months and days until the new little person arrives, how to decorate the nursery is on your mind. We’ve all seen the typical pink for girls and blue for boys which of course may need to change for the next child, and/or may only work for the first few years.
Why not play up the nursery to be a space for them to live and learn in? A mural can be done ranging on many themes, for instance:
The circus (leave off the clowns if they don't thrill you)
A jungle
The zoo
Nursery rhymes
Favorite cartoon characters
Cars, trucks, fire engines with little paved roads
Teddy bear picnic
Garden party
Tea party
Forest theme
Island theme
Farm animals
Boats, sailing, surf boarding
Princess (baby girl's name as "Princess Mary")
Puppies and kittens (any baby animals)
Clouds
Under the sea
Noah's ark
Cowboys
Butterflys, bugs, birds
Wizard of Oz
Winnie the Pooh
Sports - baseball, football, etc
Building blocks
Legos
Airplanes, rockets
Space, stars, moon
Kid games boards
As you see the list can go on and on. Children's rooms are a lot of fun just coming up with ideas to do!
Some nice neutral colors will see the room through the births of several children and a soft faux finish will give a room character as well.
Paint colors coordinated with the child’s toys makes the whole room balanced – the toys are part of the decorating scheme.
Chalk board paint in a section for mini artists.
For mommies to be - do not use oil paints yourself and better yet, leave the house while any painting is being done.
By the way, congratulations and best wishes for you and your new baby! Have fun creating a great baby room that will see the child through the first phases of their lives.
Keep those brushes clean,
Donna of WallDreams
Saturday, April 5, 2008
How To Paint Over Wallpaper
Here are the steps to painting walls with textured wallpaper to achieve a smooth finish:
1. Protect all trim with painter's tape.
2. Apply an odorless, oil-based primer to the walls. Make sure the room is well ventilated and that you wear a respirator. Do not use a latex- or water-based primer, as it will deactivate the glue under the wallpaper and create bubbles.
3. Once the primer is dry, apply the joint compound. Roll the joint compound onto an 8-by-4-foot area, then smooth it out with a trowel. Continue working around the room in sections until all the walls have been coated.
4. Allow the walls to dry for 24 hours.
5. Scrape the walls with a scraping tool to smooth out the joint compound.
6. Repeat steps 3 and 4 for a second coat.
7. After the second coat has dried, it needs to be sanded using a 180-grit sandpaper or sanding sponge. Have a lot of light in the room during this step so you can see fine lines, scratches and nicks, which can easily be sanded out. Again, make sure the room is well ventilated and wear a respirator.
8. Clean up all the dust created by the sanding.
9. Now you apply one coat of primer and two coats of paint or more until full coverage is achieved.
Ladder
Plastic
Drop cloths
Drywall pan and blades
Patching compound
Plastic snap off razor blades or utility knife
Odorless oil base primer
Blue tape
Sandpaper or sponges
500 watt Halogen lights
Paint brushes
High quality non shedding solvent resistant sleeve for priming
Matt Jaworski
Jaworski Coatings, Inc
41735 Oberlin Elyria Road
Elyria, Ohio 44035
http://www.welovepainting.com/
866-874-2114
Article Source: http://EzineArticles.com/?expert=Matt_Jaworski
WallDreams Paint Ideas! Sometimes wallpaper removal is just not worth the bandwidth. Some older papers are a horror to remove and of course, how many layers are under there is a treasure hunt in pattern styles. Faux painting over wallpaper is a great choice, time and work saver when that worn out wallpaper has to go!
Other points to consider when painting over wallpaper include:
Condition of the wallpaper - if good, seal the edges, seams and surface. If not too bad, reglue, sand and seal any bubbles or lifted areas.
How new the paper is - wallpapers that were applied in recent years may just pull off more easily with some Dif and a paper tiger (a little rolley claw thingie that perforates the paper). Follow the manufacturer's directions and be patient. Let Dif do its job.
The design texture of the wallpaper itself may influence what needs to be done to correct it - total removal and/or the finish over it.
How dark the print of the paper is will influence how many coats of primer and/or paint to cover it.
Clean the surface before priming.
Remember : Painting is far easier to change than wallpaper when you have decorating fever!
1. Protect all trim with painter's tape.
2. Apply an odorless, oil-based primer to the walls. Make sure the room is well ventilated and that you wear a respirator. Do not use a latex- or water-based primer, as it will deactivate the glue under the wallpaper and create bubbles.
3. Once the primer is dry, apply the joint compound. Roll the joint compound onto an 8-by-4-foot area, then smooth it out with a trowel. Continue working around the room in sections until all the walls have been coated.
4. Allow the walls to dry for 24 hours.
5. Scrape the walls with a scraping tool to smooth out the joint compound.
6. Repeat steps 3 and 4 for a second coat.
7. After the second coat has dried, it needs to be sanded using a 180-grit sandpaper or sanding sponge. Have a lot of light in the room during this step so you can see fine lines, scratches and nicks, which can easily be sanded out. Again, make sure the room is well ventilated and wear a respirator.
8. Clean up all the dust created by the sanding.
9. Now you apply one coat of primer and two coats of paint or more until full coverage is achieved.
Things you'll need for painting over wallpaper:
About Author:
Matt Jaworski
Jaworski Coatings, Inc
41735 Oberlin Elyria Road
Elyria, Ohio 44035
http://www.welovepainting.com/
866-874-2114
Article Source: http://EzineArticles.com/?expert=Matt_Jaworski
WallDreams Paint Ideas! Sometimes wallpaper removal is just not worth the bandwidth. Some older papers are a horror to remove and of course, how many layers are under there is a treasure hunt in pattern styles. Faux painting over wallpaper is a great choice, time and work saver when that worn out wallpaper has to go!Other points to consider when painting over wallpaper include:
Enjoy All the Spring Colors,
Donna of WallDreams
Friday, April 4, 2008
How to Disguise a Not so Smooth Wall
Do you have one of those walls, with nicks and bumps and just all round tired looking wall? Maybe you removed very old wallpaper and its left a wall that either needs to be replaced with new drywall or plastered.
Well, if this project was not in your budget this year, then why not try working with it, instead of covering it up! Have you ever done a faux finish? painted a mural? well both of these methods are great ways to extend the life of a "not so nice wall".
First of all, make sure you wall is clean and dry, and any loose bits have been removed, then decide on your color theme. A mottled look is a great quick way to give the wall some life and a old world plaster look, and you can achieve this by painting the lightest color first. Your color theme should be of similar colors or just different shades of the same one for a mottled effect.
While that is drying, get your next colors ready in small trays and add some glaze, (this extends the drying period to give you time to work with it) or if you can't get any glaze, thin the paint with a tiny bit of water, but you will have to work fast. Once your base coat is dry, start dabbing on your next color and find the effect you like, or take a cloth and basically "wash" the wall lightly with it, and keep adding other colors that are part of your theme.
You should end up with a mottled look, that can appear like old plaster, and with your walls lumps and bumps this will actually help give it the look! You can experiment with different techniques, you can drag a dry paint brush through the wet paint to give a linen look.. just try different ideas, you have nothing to lose, this wall will look way better no matter what you do at this point! So don't worry if you are not a great artist, this makes for a nice bit of artwork when done and extends the life of the wall.
Another great way is to paint a mural pick something simple to begin with, and then make sure you have the colors needed a quick hint, you don't want to be spending hundreds on all different colors of paints, just pick a simple scene that can use different shades of about 3 colors or whatever you have around your house if using latex, you can mix them to get your shades such as for trees, or sky or water make your mural simple and not too busy, and have fun! Depending on where this wall is, you could also let older kids become artists!.. especially since they love to paint on walls anyways, and this would definitely become a conversation piece!
About Author:
Diane Palmer http://www.make-crafts-for-cash.com/donnadewberry.html is a website by Diane Palmer, with more than 15 years in the crafts business. Learn creative ways to make and sell crafts, online, craft shows, fairs and more Turn your craft hobby into a business!
Article Source: http://EzineArticles.com
WallDreams Paint Ideas! Sponge painting and colorwashing in a low sheen medium tone are good ways to camouflage minor imperfections as well as using a tissue paper or paper bag effect. But it's always a good idea to correct as many of the flaws beforehand with scraping, spackle, and sanding (aka - old fashioned elbow grease), unless a plaster (not a Venetian plaster) is being applied for an "old world" look.
Part of the "camouflage" effect of a faux finish or painted wall decoration (garland, vining, scrolls, a mural, etc.) is that it pulls the eye to the focal point and away from the wall surface. As always, the higher the sheen of the paint, those bumps, holes, ridges or a bad paint job basically glow in the dark. As a final disquise, a well-placed piece of furniture or picture hung on a wall over a boo-boo always works too.
Keep those brushes clean!
Donna of WallDreams
Well, if this project was not in your budget this year, then why not try working with it, instead of covering it up! Have you ever done a faux finish? painted a mural? well both of these methods are great ways to extend the life of a "not so nice wall".
First of all, make sure you wall is clean and dry, and any loose bits have been removed, then decide on your color theme. A mottled look is a great quick way to give the wall some life and a old world plaster look, and you can achieve this by painting the lightest color first. Your color theme should be of similar colors or just different shades of the same one for a mottled effect.
While that is drying, get your next colors ready in small trays and add some glaze, (this extends the drying period to give you time to work with it) or if you can't get any glaze, thin the paint with a tiny bit of water, but you will have to work fast. Once your base coat is dry, start dabbing on your next color and find the effect you like, or take a cloth and basically "wash" the wall lightly with it, and keep adding other colors that are part of your theme.
You should end up with a mottled look, that can appear like old plaster, and with your walls lumps and bumps this will actually help give it the look! You can experiment with different techniques, you can drag a dry paint brush through the wet paint to give a linen look.. just try different ideas, you have nothing to lose, this wall will look way better no matter what you do at this point! So don't worry if you are not a great artist, this makes for a nice bit of artwork when done and extends the life of the wall.
Another great way is to paint a mural pick something simple to begin with, and then make sure you have the colors needed a quick hint, you don't want to be spending hundreds on all different colors of paints, just pick a simple scene that can use different shades of about 3 colors or whatever you have around your house if using latex, you can mix them to get your shades such as for trees, or sky or water make your mural simple and not too busy, and have fun! Depending on where this wall is, you could also let older kids become artists!.. especially since they love to paint on walls anyways, and this would definitely become a conversation piece!
About Author:
Diane Palmer http://www.make-crafts-for-cash.com/donnadewberry.html is a website by Diane Palmer, with more than 15 years in the crafts business. Learn creative ways to make and sell crafts, online, craft shows, fairs and more Turn your craft hobby into a business!
Article Source: http://EzineArticles.com
WallDreams Paint Ideas! Sponge painting and colorwashing in a low sheen medium tone are good ways to camouflage minor imperfections as well as using a tissue paper or paper bag effect. But it's always a good idea to correct as many of the flaws beforehand with scraping, spackle, and sanding (aka - old fashioned elbow grease), unless a plaster (not a Venetian plaster) is being applied for an "old world" look.Part of the "camouflage" effect of a faux finish or painted wall decoration (garland, vining, scrolls, a mural, etc.) is that it pulls the eye to the focal point and away from the wall surface. As always, the higher the sheen of the paint, those bumps, holes, ridges or a bad paint job basically glow in the dark. As a final disquise, a well-placed piece of furniture or picture hung on a wall over a boo-boo always works too.
Keep those brushes clean!
Donna of WallDreams
Tuesday, April 1, 2008
Paint Swatches - The Secret To Successful Decorating!
Paint swatches are your best friend when it comes to choosing paint colors to decorate the walls, furniture and other items within your home. A paint swatch has been designed to show you the many shade possibilities you have if your focus is on one particular color.
For instance, if you wish to paint your room blue possible shades that await you include: azure, cerulean, periwinkle, denim, navy blue, cobalt blue, sapphire, ultramarine, light blue, indigo and hundreds of other hues.
Something else you will notice when looking at blue paint swatches, for example, is that you can choose blue hues that feature tones of green, purple and gray. Therefore, you have plenty to consider when you go color hunting.
The only problem is, with so much to choose from, finding the right shade can be both a difficult and tedious task.
To help you narrow down your decision making when it comes time to stare at the wall of paint swatches at your local paint or home improvement store, the following are some helpful interior painting tips you can keep in mind:
Warm or Cool – Think of the room you will be painting. Is it an area where you do most of your relaxing, entertaining or eating? For instance, if you are painting your bedroom it’s a good idea to choose a cool color such as blue or green that encourages relaxation.
On the other hand, if you are painting a kitchen or dining room you may want to use a warm red or orange to help increase appetite and conversation. Warm colored paint swatches include red, yellow and orange, while cool colors are blue, green and purple.
Light - Medium -Dark – Once you select the main color, you need to decide if you would rather a light, medium or dark shade. Light shades are a good choice for rooms that are small such as bathrooms, or for rooms that have few or no windows. Light colors also create a more subdued look.
Medium tones provide a more dramatic look and are a better choice for kitchens and large open spaces such as the family room.
Dark tones are not typically used for walls and are more commonly used for painting room accents such as furniture, trim or cabinets. However, dark walls may be desirable in bedrooms or to compliment a theme.
When looking at paint swatches you will notice that the colors featured on each swatch move from dark to light. Notice how different the darkest shade is to the lightest. Depending on if you use the dark or light shade will create an entirely different affect on the room you are painting.
Theme – Do you have a theme that requires certain colors? For instance, if you are doing a country theme, light yellow and blue are ideal choices. On the other hand, a Mexican theme would require spicier colors such as cinnamon and terracotta. This is something else you need to keep in mind when looking at paint swatches.
Neutrals – One of the biggest problems with adding color to walls is the color you choose may limit your ability to keep a space versatile. In other words, it is more likely for you to grow tired of a room that has a defined color on the walls than one with a neutral shade. There are plenty of neutral swatches you can consider.
The more specific you are with your color preference the easier time you will have selecting helpful paint swatches.
About Author:
Michael Holland is the creator of home-decorating-made-easy.com. Visit his site for more great information about interior paint colors
Article Source: http://www.isnare.com/
Featured Video:
How to Choose a Color Scheme & Paint: Interior Design & Painting Tips : Pt. 2 - Making a Color Diagram: Interior Design & Painting Tips
Part 2 - Learn how to make a diagram of the color scheme for your home. Get painting tips for walls & ceilings in this free home improvement video.
(Part 1 is featured on Monday, March 24, 2008)
WallDreams Paint Ideas!
What's in a paint chip name, anyway?
You've seen them:
Sherwin Williams' Bagel, Loveable, Elation, Impetuous, Sequin, and Spun Sugar.
Benjamin Moore's King Arthur's Court, Cat's Meow, Jack and the Beanstalk, and Fun 'n Games.
What color is a Cat's Meow anyway? The name doesn't give us a clue as to what it really is but it sounds kind of cute, right?
It's all about the marketing and naming something so that it sells. Whether the name sounds tantalizingly delicious, catchy, or quirky the name doesn't matter a hoot once it's up on your wall. It will still be a form of red, blue, green, yellow, white, black, purple, pink, beige, etc. Don't let a name detract you from your color choice.
A "Lemon Chiffon" at one store will not be the same at another store.
There is no standard color naming scheme across the different paint manufacturer's nor are their sheen levels exact. If you try to match a color from one paint or home store, at another paint shop you probably will not match the color precisely.
Tips:
If you find you are running out of paint, stop at the nearest edge or corner, even if you are buying more paint from where you purchased the original color. Slight variations can and do occur.
When using more than one gallon of the same paint, box them. This means get a large bucket and pour all the same paint together, mixing well. This eliminates any color discrepancies. Keep the pail covered between paint tray pourings as it is air's job is to dry the paint wherever it finds it.
For instance, if you wish to paint your room blue possible shades that await you include: azure, cerulean, periwinkle, denim, navy blue, cobalt blue, sapphire, ultramarine, light blue, indigo and hundreds of other hues.
Something else you will notice when looking at blue paint swatches, for example, is that you can choose blue hues that feature tones of green, purple and gray. Therefore, you have plenty to consider when you go color hunting.
The only problem is, with so much to choose from, finding the right shade can be both a difficult and tedious task.
To help you narrow down your decision making when it comes time to stare at the wall of paint swatches at your local paint or home improvement store, the following are some helpful interior painting tips you can keep in mind:
Warm or Cool – Think of the room you will be painting. Is it an area where you do most of your relaxing, entertaining or eating? For instance, if you are painting your bedroom it’s a good idea to choose a cool color such as blue or green that encourages relaxation.
On the other hand, if you are painting a kitchen or dining room you may want to use a warm red or orange to help increase appetite and conversation. Warm colored paint swatches include red, yellow and orange, while cool colors are blue, green and purple.
Light - Medium -Dark – Once you select the main color, you need to decide if you would rather a light, medium or dark shade. Light shades are a good choice for rooms that are small such as bathrooms, or for rooms that have few or no windows. Light colors also create a more subdued look.
Medium tones provide a more dramatic look and are a better choice for kitchens and large open spaces such as the family room.
Dark tones are not typically used for walls and are more commonly used for painting room accents such as furniture, trim or cabinets. However, dark walls may be desirable in bedrooms or to compliment a theme.
When looking at paint swatches you will notice that the colors featured on each swatch move from dark to light. Notice how different the darkest shade is to the lightest. Depending on if you use the dark or light shade will create an entirely different affect on the room you are painting.
Theme – Do you have a theme that requires certain colors? For instance, if you are doing a country theme, light yellow and blue are ideal choices. On the other hand, a Mexican theme would require spicier colors such as cinnamon and terracotta. This is something else you need to keep in mind when looking at paint swatches.
Neutrals – One of the biggest problems with adding color to walls is the color you choose may limit your ability to keep a space versatile. In other words, it is more likely for you to grow tired of a room that has a defined color on the walls than one with a neutral shade. There are plenty of neutral swatches you can consider.
The more specific you are with your color preference the easier time you will have selecting helpful paint swatches.
About Author:
Michael Holland is the creator of home-decorating-made-easy.com. Visit his site for more great information about interior paint colors
Article Source: http://www.isnare.com/
Featured Video:
How to Choose a Color Scheme & Paint: Interior Design & Painting Tips : Pt. 2 - Making a Color Diagram: Interior Design & Painting Tips
Part 2 - Learn how to make a diagram of the color scheme for your home. Get painting tips for walls & ceilings in this free home improvement video.
(Part 1 is featured on Monday, March 24, 2008)
WallDreams Paint Ideas!What's in a paint chip name, anyway?
You've seen them:
Sherwin Williams' Bagel, Loveable, Elation, Impetuous, Sequin, and Spun Sugar.
Benjamin Moore's King Arthur's Court, Cat's Meow, Jack and the Beanstalk, and Fun 'n Games.
What color is a Cat's Meow anyway? The name doesn't give us a clue as to what it really is but it sounds kind of cute, right?
It's all about the marketing and naming something so that it sells. Whether the name sounds tantalizingly delicious, catchy, or quirky the name doesn't matter a hoot once it's up on your wall. It will still be a form of red, blue, green, yellow, white, black, purple, pink, beige, etc. Don't let a name detract you from your color choice.
A "Lemon Chiffon" at one store will not be the same at another store.
There is no standard color naming scheme across the different paint manufacturer's nor are their sheen levels exact. If you try to match a color from one paint or home store, at another paint shop you probably will not match the color precisely.
Tips:
If you find you are running out of paint, stop at the nearest edge or corner, even if you are buying more paint from where you purchased the original color. Slight variations can and do occur.
When using more than one gallon of the same paint, box them. This means get a large bucket and pour all the same paint together, mixing well. This eliminates any color discrepancies. Keep the pail covered between paint tray pourings as it is air's job is to dry the paint wherever it finds it.
Monday, March 31, 2008
A Sampler Of Faux Finish Techniques
While Grandma's quilts showed off a sample of her pretty bits of fabric and her skill with many different fancy needle stitches - imagine what she could have done with a pot of glaze and a sponge. That's right. As artistic and skilled as Grandma was she probably would be right at home with faux finish paints, too.
There are so many options available to today's homeowner when it comes to choosing alternatives to traditional flat paint. There's absolutely no reason to hang onto that boring tried-and-true white (or taupe, taupe, taupe) painted in every room throughout your home.
Explore the alternatives. Look in magazines for rooms that appeal to you. Architectural Digest, Southern Accents, Veranda and others all regularly feature homes that have faux finishes on everything from walls to furniture. Designers love to change the feel of a space with color and textures, painted faux finishes are an easy first step in that direction. You can do the same thing, too.
Faux finishes can be applied to almost any surface. From walls, ceilings, cabinetry in the kitchen and bath, floors, to all types of solid furniture as well. Styles of finishes can be extremely simple and subtle, to way, way over-the-top fantasy finishes, depending on your personal taste and pocketbook.
For your walls, here's something to think about -- a faux wall finish can provide a striking and seamless alternative to wallpaper. Seamless. No peeling or splitting. Just a beautiful hand-painted unique finish individually crafted for you alone.
A skilled faux finish artist can create a look just for you that the wallpaper manufacturers would love to copy and mass-market. Some of the more popular looks for walls include:
Color washes - ragged, bushed, sponged single glazes over solid paint, the work-horse of faux finishes
Multiple glazes - layered over solid paint, provides great depth
Faux leather looks - terrific in a study
Faux suede - stipple glaze over solid paint
Stencil over-all patterns - antique damask or simple borders
Venetian plasters - lustrous beautiful plasters
Tuscan old-world plasters - troweled on plaster, chipped, cracked and aged to perfection
Faux stone effects - limestone, fieldstone, slate, cut and fitted patterns
Faux brick looks
Faux wood - faux bois, antiqued, distressed, burled, bamboo
Faux metal - brilliant metallic glazes, antique iron, verdigris
Tissue paper - textured paper, paint and glaze
Stripes - glazed or just painted, always classy
On columns, trim, doors, crown molding, fireplaces and art niches there are a number of cool faux finishes that can enhance the architecture of any room. Classic looks feature:
Marble - from travertine to Rojo Viejo, the choices are wide open
Granite - mimic your countertops
Fantasy stones, such as lapis and malachite
Gilding - any metal leafing, gold, silver, copper
Strie - fine dragging of colored glaze over a solid paint
Antique or distressed faux finishes are wonderful choices on cabinetry and furniture. Adding a few worn edges and some crackled paint to those dated, tired kitchen cabinets can give them a fresh new “old” look. Think Provence.
It's easy to expand your options. Change your mind about what's acceptable for your sweet home space. Play a little with something fresh and new. Remember, changing the dynamics of your home is easy with the assistance of a skilled and experienced faux finish artist.
Always go to a pro who has a track record and samples and customers who love to tell you about the artist's work that was created just for them. Then let him create a special room just for you.
He can guide you to faux finishes and colors that will be appropriate to your style, your furnishings, and your pocketbook. Consult with a trained professional artist and get the best look for your home today.
Oh. And keep in mind, if you are tired of that old chest-of-drawers and thinking about tossing it out, maybe all it needs a good old-fashioned antiquing. A dab of glaze here, another dab there. Just right.
Grandma would approve, no doubt.
About Author:
Jay Dorman is the owner of Greystone Artisans, a decorative painting and faux finishing company. This Houston-based company has been in business for eight years and has worked in many of the finest homes locally and in other cities in Texas. This team of talented artists is available for travel to locations outside of Texas, too! Consultations are available upon request and are at no cost. Hundreds of samples including cabinetry finishes and wall finishes of all types can be seen at our showroom. The showroom, which houses our workroom as well, is open by appointment. Please visit us on the web at: http://www.greystoneartisans.com
Thursday, March 27, 2008
Softening Your Walls with Color Wash
If you like the soft look of watercolors, why not try using a color wash on your walls? In addition to a softer color, color washing can accentuate the texture of your plaster or stucco walls. And it's so simple that even I, a faux-finish-impaired decorator, can do it.
There are two techniques for color wash application: sponge or brush. Each requires a slightly different glaze formula.
Sponge Technique:
Color Wash Glaze: Mix together 1 part latex paint and 6 parts water in a bucket.
1. Mask off (using painter's tape) parts of the room which will not receive the wash. Its best to cover the floor with plastic drop cloths (especially if you are as messy as I am).
2. Prime the wall with a low luster latex paint and allow it to dry completely before the next step.
3. Dip the sponge into the color wash glaze and squeeze lightly.
4. Beginning in a lower corner, apply the glaze to the wall in short, overlapping strokes. Change the direction of the strokes frequently. Work on a small portion of the wall at a time (3 foot by 3 foot is a good size).
5. Repeat moving upward until the entire wall is covered.
6. Allow to dry completely.
Brush Technique:
Brush Color Wash Glaze: 1 part flat latex paint, 1 part latex paint conditioner (available at your local home improvement center), and 2 parts water. Mix in a bucket.
1. Mask off (using painter's tape) parts of the room which will not receive the wash. Its best to cover the floor with plastic drop cloths.
2. Prime the wall with low luster latex enamel paint and allow it to dry completely before the next step.
3. Allow the paint to dry.
4. Dip a paintbrush in the glaze and remove the excess against the side of the bucket.
5. Apply the paint in a crises-cross pattern.
6. Brush over the surface repeatedly to soften the look of the paint.
7. Wipe excess glaze away, if necessary. (Better get the industrial-sized package of paper towels!)
There you have it! A soft paint look perfect for your newly decorated roomï. And since you have the technique down to a science, why not come and do my family room? Powder room? Closet?
About Author:
Hanit - For More Free Resources visit www.thedesignbuild.com
Article Source: http://www.articlerich.com
Featured Video:
Faux Like a Pro Faux finish Color Wash
Learn how to color wash you walls in a few easy steps. Let Sandra Kiss London of Faux Like a Pro show you how to apply this alternative paint finish to make your walls come alive. Go to www.Fauxlikeapro.com for more ideas.
WallDreams Paint Ideas!
Colorwashing is such an elegant finish when applied properly, the colors blending so softly into each other lend such nice texture and character background to living rooms, family rooms, foyers or bedrooms. Colorwashing can create sophisticated spaces, give an "old world" feel, or add country charm.
Keep in mind:
There are two techniques for color wash application: sponge or brush. Each requires a slightly different glaze formula.
Sponge Technique:
Color Wash Glaze: Mix together 1 part latex paint and 6 parts water in a bucket.
1. Mask off (using painter's tape) parts of the room which will not receive the wash. Its best to cover the floor with plastic drop cloths (especially if you are as messy as I am).
2. Prime the wall with a low luster latex paint and allow it to dry completely before the next step.
3. Dip the sponge into the color wash glaze and squeeze lightly.
4. Beginning in a lower corner, apply the glaze to the wall in short, overlapping strokes. Change the direction of the strokes frequently. Work on a small portion of the wall at a time (3 foot by 3 foot is a good size).
5. Repeat moving upward until the entire wall is covered.
6. Allow to dry completely.
Brush Technique:
Brush Color Wash Glaze: 1 part flat latex paint, 1 part latex paint conditioner (available at your local home improvement center), and 2 parts water. Mix in a bucket.
1. Mask off (using painter's tape) parts of the room which will not receive the wash. Its best to cover the floor with plastic drop cloths.
2. Prime the wall with low luster latex enamel paint and allow it to dry completely before the next step.
3. Allow the paint to dry.
4. Dip a paintbrush in the glaze and remove the excess against the side of the bucket.
5. Apply the paint in a crises-cross pattern.
6. Brush over the surface repeatedly to soften the look of the paint.
7. Wipe excess glaze away, if necessary. (Better get the industrial-sized package of paper towels!)
There you have it! A soft paint look perfect for your newly decorated roomï. And since you have the technique down to a science, why not come and do my family room? Powder room? Closet?
About Author:
Hanit - For More Free Resources visit www.thedesignbuild.com
Article Source: http://www.articlerich.com
Featured Video:
Faux Like a Pro Faux finish Color Wash
Learn how to color wash you walls in a few easy steps. Let Sandra Kiss London of Faux Like a Pro show you how to apply this alternative paint finish to make your walls come alive. Go to www.Fauxlikeapro.com for more ideas.
WallDreams Paint Ideas!Colorwashing is such an elegant finish when applied properly, the colors blending so softly into each other lend such nice texture and character background to living rooms, family rooms, foyers or bedrooms. Colorwashing can create sophisticated spaces, give an "old world" feel, or add country charm.
Keep in mind:
- Similar tones do work best, as it is the softness of the effect that is the goal.
- Remember to have a good color basecoat underneath, as it is the third color (or one of) the final colors showing with the semi-transparent glazes.
- A variety of tools can be used to create the effect - soft brushes, cheesecloth, plastic bags, old socks or sponges.
- Combine colorwashing with other effects for even more character. Try stripes, stenciling, stamps, embedded negative shapes.
- It is easier to work with a glaze on this technique, as a wet edge makes for quality results.
One of the VERY best paint secrets that I can pass along to you is a cleaning up tip. Mix 1/2 cup of fabric softener to one gallon of cold water to clean paint brushes, rollers, etc. You will be amazed at how easy and fast clean up becomes. Don't rinse your brushes out after swirling your paint brush, as it does help condition the hairs of the brush.
Til next time,
Donna of WallDreams.com
Wednesday, March 26, 2008
Faux Painting Finishes
Faux and Decorative Painting Sponge painting
Sponge painting is great because it is easy, fast, requires little paint and materials, and did I mention it was easy? It can be used on walls, furniture, and accessories, and can give instant facelift to dull objects.
Don't let anyone convince you that you have to go buy an expensive sea sponge to do this. I've used plastic grocery bags, cloth diapers, even old clothing…(Ok, now it's called ragging, same technique, more subtle look.) But you can use a plain old kitchen sponge, and here's the secret….tear away all the hard edges of the sponge, even tear chunks from the center to give it an irregular appearance.
Now choose your paint, and sponge! Remember to sponge sparingly at first, you can always add more later. Also, dab the paint off on your plate first, you only need a little paint on the sponge, or it will be too gloppy. Practice first on a paper bag, and remember to change the direction of your hand occasionally, the idea is not to get a pattern going.
Try combining sponge painting with stenciling or decorative painting, tape off a border and use it just there, you can even sponge paint over glassware with the new glass paints available at your craft store.
Marbelizing
There is a very simple technique to marbleizing that is popular in the home decorating world today, and you won't believe how easy it is until you try it. Simply choose two to four colors of paint within the same color scheme, one light, one medium, one dark.
Using a regular paintbrush, dip the brush into all the colors. Now simply pounce the paintbrush over the surface to get a mottled effect. It might help to keep a picture of a piece of marble nearby to refer to. Use the different colors to add shading, or tone down an area you think is too bright. When finished with the surface, take a small artists liner brush, dip it into either the lightest or darkest color you used, (thin with a little water, if necessary) and paint veins by dragging the brush over the surface, wiggling it as you go. Don't go overboard on the veining. Remember also to bring the veins over the edges for a realistic finish. I think sealing it with a gloss clearcoat or polyurethane gives the most authentic look of polished marble.
Crackling
Crackling is very popular as aged finishes have become so much a part of showcasing warmth and history in our homes. It can be done without purchasing expensive crackling kits. Crackled finishes are a simple chemical reaction. All you need are two colors of latex paint, one a base coat that will peek through, and one a top coat, that you will see the most of, and household glue. That's right, direct from your kid's art box. Sand and prime your piece if necessary, then paint with your base coat. Remember, this will be the color the will just peek through, so it's best if it contrasts with the top coat. Let dry. Now mix household glue with equal parts water, and brush onto your base coat. This can be done easiest with a foam brush. Allow the glue to dry until just tacky, about 30 minutes.
Now for the reaction part. Brush on your top coat directly over the glue coat. Don't brush over any one area more than once, you will ruin the crackle effect in that area. You should start seeing the crackling take place within a minute or so. The size of the crackles has a lot to do with your technique in applying the top coat, so experiment a little first. Long, smooth strokes tend to produce larger more dramatic cracks than short strokes, and if you really want a subtle effect, try sponging or ragging on the final coat. Allow to dry overnight. If you wish to further antique your work, simply dab or brush it with some wood stain, then wipe off. Repeat until you get the look desired. You can seal with polyurethane or clearcoat, or coat it with common furniture wax.
About Author:
Kathleen Wilson is the Editor of a free ezine called The Budget Decorator, dedicated to the "budget impaired" home decorator. Visit her at http://www.thebudgetdecorator.com/ for more free projects and ideas, and for info on her workshop.
Article Source: http://www.articlestree.com/
Featured Video:
Sponge Painting
http://www.fauxfun.com/
Sponge painting demonstration given on the Sheryl Bordon Show showing how paint a geometric sponge wall finish
WallDreams brings you information you can use - when doing it yourself is the only way to go!
Tuesday, March 25, 2008
Pattern Paint Rollers For An Amazing Finish
You love the way wallpaper looks, but you know you can't handle those huge strips of paste covered paper. Besides, if you decide you don't want to keep the wallpaper once you put it up, it is so time consuming and messy to remove. So, do you just settle for painting the walls a solid color? Before you decide to give up on your dream for beautifully patterned walls, you may want to take a look at pattern paint rollers.
There are quite a few different patterned paint rollers available, with patterns ranging from simple geometric designs to ivy vines. Some of them are better suited to creating borders, while others are perfect for painting entire rooms. People also use these rollers to make interesting designs on large pieces of furniture, such as armoires or bed headboards.
The Rollerwall Design Painting and Decorating System allows you to create the look of wallpaper patterns with your desired paint color and the patterned roller. If the pattern doesn't look right, you can wipe it off before the paint dries. When you decide you are tired of that pattern, you can just paint over the walls with a fresh coat of paint and create a whole new effect with a different patterned roller and paint color.
If you've used stencils or standard patterned rollers before, you're probably thinking that there is no way the job is that easy. What about those globs of unevenly applied paint that make the pattern blurry? However, the Rollerwall products are designed to keep the paint from being too thick or thin. A traditional roller cover is rolled in the paint. Then the patterned roller is snapped in front of the paint filled roller. As you roll the wall, the paint filled roller applies paint to the patterned roller in an even, blotch free layer, which is transferred to the wall's surface.
Another thing you may be wondering is whether matching up the pattern is as hard as matching patterns along wallpaper seams. It actually is easier, because the wallpaper is so awkward to move into place when it is such a long, sticky strip. The Rollerwall roller is designed so that you can match the new strip of paint with the previous one by using a special guide on the roller. All you need to do is make sure that your first pass with the roller goes straight up and down so that the next strip can line up easily.
Do you dread using wallpaper to decorate a room? It looks great but can be such a pain to remove once it's up. You have another option - patterned painting rollers. These give you the design you want without the headache of paper and paint. Click on over to PaintSplashes.com for more interior painting ideas.
About Author: Niall Roche
Article Source: http://EzineArticles.com/?expert=Niall_Roche
WallDreams brings you information you can use - when doing it yourself is the only way to go!
Monday, March 24, 2008
Paint Your Home With Color!
Tired of those boring white walls? Looking to give your home some character? There’s no better way to give your home a face lift then to paint your home with color!
Painting is affordable and quite easy to do. And changing the color in a room changes the atmosphere. For years white or cream paint where common wall colors throughout the house. But finally people have realized how boring that is and have turned to color for their walls.
Choosing the right paint can be a bit overwhelming if you aren’t use to working with color. Choosing the right color for a room is not as difficult as you might think.
Your paint, furniture fabric, window coverings, rug, and accessory colors will play a large role in what color you can choose. If you have your heart set on a certain color you can always change out some of the other items in your room.
One of the best clues you can have for choosing the right color is knowing what colors make you feel relaxed and happy. You’ll probably already find these colors in your home because they are the colors you’ll be drawn to.
Not sure what’s your best color? Look at the color of your pottery, your home accessories, your jewelry, and the clothing in your closet. You’ll quickly know what your color is!
Now that doesn’t mean that you have to choose that color but it does make you aware of what colors work best for you. Different colors elicit different feelings and moods. If your color isn’t appropriate for the living room it doesn’t matter. Chances are there is a room that it would look really good in. Don’t be afraid to mix colors. A yellow kitchen, a blue living room, and a red den will all look great. You do not need to use the same color throughout the house.
Feature walls always look great especially if the color you have chosen is too dark for an entire room. You can do one or two walls in your color and leave the other two white or cream. Don’t be afraid to experiment.
You should also make a trip to your local paint store. Pick up sample cards of colors you think you would like to use, or you can also pick up a color wheel. Grab as many samples as you like. That’s what they are there for. Then when you get home you can see how these colors look. Don’t forget to try them in different lighting and at night. Colors can look really different when sunlight hits them and when the lamp is their lighting. Make sure you like both affects.
Take your time choosing the color. Make sure after a week or so it’s still your favorite choice. It’s much easier to change your mind prior to painting the walls.
Here’s some color tips that will help you understand how color works. Complimentary colors are colors you will find directly across from each other on the color wheel. Harmonious colors are colors that are each side of the main color. Tint is color that is added to white and shades are colors that have had black added. Saturation is the amount of color. The more color the more vibrant the color.
Let’s say you are going to paint all four walls – two a dark blue and you want the complimentary color on the other two walls. You would take your color wheel, look straight across from your dark blue and have your complimentary color.
Let’s say you want one wall to be vibrant and bold then you would have a deeper saturation in the color. Perhaps you are going to paint the top half of a wall blue and you want to have a harmonious color for the bottom. If you looked on your color wheel you would see that purple is a harmonious color for blue.
How you use the color in your room is as important as what color you choose. Too much color or the wrong color can leave you feeling stressed and overly excited all the time. Too little color can be dreary and unmotivated.
Never be afraid to experiment. If you really hate the color you can easily change it with more paint. When it comes to painting nothing has to be permanent.
So isn’t it time to paint your home with color? Bring your home to life and give it a character all of its own!
About Author:
Deon Melchior is the Editor and Publisher of Article Click. For more FREE articles for your ezine and websites visit ArticleClick.com. Article Click is a free content article directory. This means that as a publisher you may reprint the articles that are included in our site, as long as the article is unedited and the author box is included with it's live hyperlinks.
Featured Video:
How to Choose a Color Scheme & Paint: Interior Design & Painting Tips : Pt. 1 - Making a Color Diagram: Interior Design & Painting Tips
Part 1 - Learn how to make a diagram of the color scheme for your home. Get painting tips for walls & ceilings in this free home improvement video.
WallDreams Paint Ideas!
Rarely do I see a room done in a white paint on purpose that truly works. Many of our homes and apartments are quickly painted in a white or offwhite to give it a "clean" look, but for me a white wall is just waiting for the right color, it is a blank stretched canvas, unfinished or even begun. A basic white wall feels unwelcoming and cold. Outside of our door, in nature is every color imaginable - the color of sky, earth, water, stone; every growing thing; flowers, trees, animals. There are colors and combinations of colors that you love.
If you can put together an outfit that makes you look and feel great, you can pick a wall color!
For some help in understanding color better, here are some very helpful links.
http://www.writedesignonline.com/resources/design/rules/color.html
http://interiordec.about.com/cs/artic12/a/des_decordos.htm
http://www.interior-design-it-yourself.com/decorating-with-color.html
http://www.makedecor.com/
Now, get a bucket of paint and get started!
Painting is affordable and quite easy to do. And changing the color in a room changes the atmosphere. For years white or cream paint where common wall colors throughout the house. But finally people have realized how boring that is and have turned to color for their walls.
Choosing the right paint can be a bit overwhelming if you aren’t use to working with color. Choosing the right color for a room is not as difficult as you might think.
Your paint, furniture fabric, window coverings, rug, and accessory colors will play a large role in what color you can choose. If you have your heart set on a certain color you can always change out some of the other items in your room.
One of the best clues you can have for choosing the right color is knowing what colors make you feel relaxed and happy. You’ll probably already find these colors in your home because they are the colors you’ll be drawn to.
Not sure what’s your best color? Look at the color of your pottery, your home accessories, your jewelry, and the clothing in your closet. You’ll quickly know what your color is!
Now that doesn’t mean that you have to choose that color but it does make you aware of what colors work best for you. Different colors elicit different feelings and moods. If your color isn’t appropriate for the living room it doesn’t matter. Chances are there is a room that it would look really good in. Don’t be afraid to mix colors. A yellow kitchen, a blue living room, and a red den will all look great. You do not need to use the same color throughout the house.
Feature walls always look great especially if the color you have chosen is too dark for an entire room. You can do one or two walls in your color and leave the other two white or cream. Don’t be afraid to experiment.
You should also make a trip to your local paint store. Pick up sample cards of colors you think you would like to use, or you can also pick up a color wheel. Grab as many samples as you like. That’s what they are there for. Then when you get home you can see how these colors look. Don’t forget to try them in different lighting and at night. Colors can look really different when sunlight hits them and when the lamp is their lighting. Make sure you like both affects.
Take your time choosing the color. Make sure after a week or so it’s still your favorite choice. It’s much easier to change your mind prior to painting the walls.
Here’s some color tips that will help you understand how color works. Complimentary colors are colors you will find directly across from each other on the color wheel. Harmonious colors are colors that are each side of the main color. Tint is color that is added to white and shades are colors that have had black added. Saturation is the amount of color. The more color the more vibrant the color.
Let’s say you are going to paint all four walls – two a dark blue and you want the complimentary color on the other two walls. You would take your color wheel, look straight across from your dark blue and have your complimentary color.
Let’s say you want one wall to be vibrant and bold then you would have a deeper saturation in the color. Perhaps you are going to paint the top half of a wall blue and you want to have a harmonious color for the bottom. If you looked on your color wheel you would see that purple is a harmonious color for blue.
How you use the color in your room is as important as what color you choose. Too much color or the wrong color can leave you feeling stressed and overly excited all the time. Too little color can be dreary and unmotivated.
Never be afraid to experiment. If you really hate the color you can easily change it with more paint. When it comes to painting nothing has to be permanent.
So isn’t it time to paint your home with color? Bring your home to life and give it a character all of its own!
About Author:
Deon Melchior is the Editor and Publisher of Article Click. For more FREE articles for your ezine and websites visit ArticleClick.com. Article Click is a free content article directory. This means that as a publisher you may reprint the articles that are included in our site, as long as the article is unedited and the author box is included with it's live hyperlinks.
Featured Video:
How to Choose a Color Scheme & Paint: Interior Design & Painting Tips : Pt. 1 - Making a Color Diagram: Interior Design & Painting Tips
Part 1 - Learn how to make a diagram of the color scheme for your home. Get painting tips for walls & ceilings in this free home improvement video.
WallDreams Paint Ideas!Rarely do I see a room done in a white paint on purpose that truly works. Many of our homes and apartments are quickly painted in a white or offwhite to give it a "clean" look, but for me a white wall is just waiting for the right color, it is a blank stretched canvas, unfinished or even begun. A basic white wall feels unwelcoming and cold. Outside of our door, in nature is every color imaginable - the color of sky, earth, water, stone; every growing thing; flowers, trees, animals. There are colors and combinations of colors that you love.
If you can put together an outfit that makes you look and feel great, you can pick a wall color!
For some help in understanding color better, here are some very helpful links.
http://www.writedesignonline.com/resources/design/rules/color.html
http://interiordec.about.com/cs/artic12/a/des_decordos.htm
http://www.interior-design-it-yourself.com/decorating-with-color.html
http://www.makedecor.com/
Now, get a bucket of paint and get started!
Sunday, March 23, 2008
How to Bid Painting Jobs - 6 Vital Things to Consider
Estimating house painting jobs is something that you develop over time. I can go into any house and go from room to room and tell you by eye just how much paint you will need to do the ceilings, walls and woodwork. I can also tell you just about how long it will take to paint each room basically.
I can even tell you just about how long it will take to paint each room in general. But estimating many times goes a lot deeper than just eyeballing a few simple rooms. So here are 6 points to help you when figuring your bids or estimates.
1.) Know Your Target Market
When getting prepared to do a painting estimate you first need to know your target market or markets. Are you going to be painting in the mid-class neighborhoods or are you aiming for the high-end expensive neighborhoods? Or are you going after commercial or industrial accounts?
Now you can you gauge how high you are going to set your bid rates. You can have have high-end rates for larger homes, or for commercial or industrial painting, and mid prices for the rest.
Personally, when it comes to painting for residential customers, I keep my rates the same. I do not care if it's high-end or middle class. If they cannot afford my painting services, I am out of there. Once you have painted at a higher price, it's hard to go lower unless of course, you are hard up.
If you are estimating painting jobs for big business you can and should aim competitively high without worrying about much competition as you would in residential painting. Plus larger commercial customers have deep pockets. Also to consider, if you are tackling those types of accounts you will need extra painters anyways so you definitely need to aim high in your bidding to cover their wages and benefits.
2.) Fool-Proof System
You need an accurate estimating method that works perfectly every time without fail. Whether inside or outside. You can stand and stare at a project all day and try to guesstimate exactly how long it will take you to paint something or you can use an accurate method for bidding paint jobs and walk away smiling and not wondering if you might bite the bullet on that one.
3.) Allowances
You need to allow for fuel, travel time and even giving Uncle Sam his cut. If your going to be driving long miles you definitely want to account for fuel and travel time, even overnight expenses if you get that radical in your painting business. Again, if you have employees you will need to account for their wages and benefits in your bids also.
4.) Hidden Expenses
You need to be aware of hidden expenses or projects that add extra time and extra materials to a job. Things like hard to cover colors, excessive prep time, high-work, down time due to outside sources that are common in new construction, etc.
5.) Cost of Materials
You need to know how much paint and materials you will be using. (Note: A good estimating system will automatically include all your paints and materials.)
6.) Flexible Methods
Your estimating system should have several ways of figuring your bids. Just like a set of golf clubs, some times you need a different driver to make it on to the next green.
Different jobs require different painting estimating techniques.
For example: painting ceilings, walls and woodwork estimating can change if you have excessive woodwork like walk-in closets with tons of shelving. Or rooms with high walls.
The same goes for exterior work in residential painting. Are the surfaces smooth and clean or is there stucco or shingles that require extra time and materials? When you have an accurate system in place you can build up an estimate to meet the type of project you are bidding on.
Many times on larger estimates, I will cross-check my painting bid from different angles by using two different estimating techniques just to make sure I have it all together and did not leave anything out of the big picture.
About Author:
Lee Cusano has owned and operated his own successful painting business for over 16 years now. Lee has also helped many others to start their own painting business with his Paint Like a Pro Estimating and Advertising CD-ROM. He also offers a free report titled "How To Gain a High Success Rate For Getting Painting Jobs". To get it visit http://www.painting-business.com
Article Source: http://www.articlesbase.com
WallDreams brings you information you can use - when running your painting business is the only way to go!
Saturday, March 22, 2008
Decorative And Faux Painting Is Fun But Don’t Start Until You Read This
I think decorative and faux painting techniques look great, are fun to do, and add a personal statement to a room. I’ve been adding my personal look to the walls in my homes ever since my husband and I purchased our first “fixer-upper.”
When I first starting using faux and decorative painting techniques on the walls in our home it was a financially motivated action. We didn’t have a lot of extra money. I couldn’t afford new furniture or flooring for a room but I could afford to buy some paint. But just painting the walls a solid color seemed boring to me so I started exploring faux and decorative painting. It didn’t take me long to get hooked. Why do I like faux and decorative painting on walls so much?
1) It’s an inexpensive way to change the look of an entire room. Paint is the most economical way to change the look of a room.
2) A painting technique on the walls minimizes and hides cosmetic flaws such as surface cracks and less than perfect patching jobs.
3) It’s easy to change when you’re sick of it. Repainting a room that has paint on the walls is a whole lot easier and much less time consuming than stripping wallpaper off walls and preparing those walls for paint.
4) It adds your own personal look and style to a space. Color and texture are fun and interesting. An entire home painted the same off-white color is dull and boring to me. A faux painting technique can evoke any mood you want in a room whether it’s a Tuscan look, retro 70’s look, a country look, something elegant, a cheery bright look for a child’s room, or any other look you want.
5) The choices of techniques and paints are nearly endless. Some of the more popular technique choices include: sponging, ragging, dragging, color washing, stenciling, crackling (http://www.decorativepaintingzone.com/faux/cracklingfauxpainting), marbling, gilding, wood-graining, spattering, feather-dusting, and stippling. You could also use one of the specialty paint products on the market today such as Venetian plaster to create the look you want or buy a faux painting kit such as a Woolie painting kit to help make your project as fun and easy as possible.
While I highly recommend faux or decorative painting, there are a few things I’ve learned since I’ve started faux painting that I’d like to share with you. Some of these items are things to “not do” that I’ve learned the hard way. Others are tips and suggestions that were helpful to me.
1) Go to your local paint store or decorative painting store and look at the samples they have. For example, Home Depot has lots of different booklets and paint chips with faux paint finishes on them for you to look at and even take home to look at in your lighting. That pretty metallic finish on a paint chip in the store make look garish when you get it home and look at it in your home’s natural lighting.
2) Consider taking a class before doing your first project. Some paint stores and home improvement stores, such as Home Depot, offer free faux painting clinics and workshops. You can also find some very good faux painting classes for a reasonable fee by looking in your local paper or doing an Internet search.
3) Practice your technique on a piece of scrap wallboard before doing it on your wall. This is especially important if you are blending colors. A few years ago my son wanted his bedroom painted. He wanted me to use a Woolie (a great faux painting tool available at most paint supply stores) to blend together a burgundy and a caramel color. Each color looked great by itself, but when they got blended together too much a dark fuchsia color emerged. And anything resembling pink was not something my son wanted on his wall!
Because I had been faux painting for years I didn’t listen to my own advice about trying the technique on a piece of scrap board first nor did I buy sample sizes of paint to try out. I bought gallons because I wanted to save time. Luckily the store agreed to exchange the paint for me free of charge but we did have to paint over a wall and wait for it to dry before starting over with new colors.
4) Remember that the texture of your walls will dictate, to some extent, what faux painting techniques you can and cannot use. If your walls are smooth you can do just about any technique you want. But textured walls are very common, especially in newer homes. You may see striped walls in a brochure or on a sample wall and decide that’s what you want to do in your home; but if your walls are textured it’s going to be nearly impossible to achieve straight lines for your stripes. Keep in mind that faux finishes on paint chips from a store are done on a smooth surface. They will look a little different (but may still look very nice) if you do that same technique with the same colors on a textured wall.
5) If you’re going to do a faux technique in an entire room don’t start on the wall that people will first look at when they walk into the room. That means don’t start on the wall directly across from the doorway. Unless you’re a professional, it takes a little while for you to get your technique perfected in a room. Put that less than perfect start in the least noticeable part of the room.
6) If you get tired while painting and need a break, don’t stop in the middle of a wall. Stop at a corner. If you stop in the middle of the wall and don’t come back to work on the project again until after the paint is dry, you’re going to have a noticeable line on the wall. It won’t be pretty.
7) Think twice about mixing your own color with paint you have at home unless you are absolutely positive you’re going to have enough paint to do the entire job. If you mix your own color and run out of paint before you finish it will be time-consuming and challenging to match that color. You might be able to match it because many paint stores have specialty machines that can match a paint chip you take in, but if you’ve mixed together two different sheens of paint (for example let’s say you mixed a flat paint and a satin paint together) you’re going to have a hard time reproducing that same sheen. In some cases it may not be noticeable; but in other cases it will.
If you’re a beginner, start with an easy paint technique. Sponging is very easy and looks great. Another favorite of mine is the Woolie I mentioned earlier. There are a couple of different types. I like the Woolie roller best. It’s really easy to use and the results are fantastic. It comes with a short video. Watch it before you start painting. If you’re not going to watch the video before you buy your paint, there’s one important thing to remember. Buy paint colors that are at least two places away from each other on a paint strip. For example, if you pick out a paint strip with 5 yellows on it, don’t buy two colors that are right next to each other because they will be so close in color that you won’t see much variation when you put those colors on the wall and start to blend them.
About Author:
Dorrie Ruplinger is a featured writer for http://www.decorativepaintingzone.com. Visit the web site for more information on decorative painting and faux painting
Article Source: http://www.isnare.com
WallDreams brings you information you can use - when doing it yourself is the only way to go!
Friday, March 21, 2008
Italian Lime Plaster Decorative Wall Finishes Add Old World Charm
The use of Italian decorative plaster has become an increasingly popular decorating technique in homes across America. It's a versatile medium that can be used in a number of ways to create dramatic wall and ceiling effects, and its use has been growing in recent years around the country.
Italian decorative plaster generally consists of a thin veneer of slaked lime putty, which is then mixed with quartz, marble, or kaolin and colored with pigment. It's then applied in a variety of ways to produce room treatments that resemble those that used to be found almost exclusively in northern Italy for nearly a thousand years.
However, even though it has been commonly used in northern Italy for millennia, lime plaster is among the world's oldest building materials. In fact, there is evidence to show that its use may date back as far as 9,500 years in the area that is now known as Jordan. Over the centuries, the Romans began to mix lime plaster with marble dust as a fine application over a coarser type of lime and sand aggregate, similar to the technique used in modern decorating techniques. Its use has been nearly continuous around the world from that time on, especially in Italy and other parts of Europe.
One of the most common phrases used when referring to Italian decorative plasters is the term Venetian, although it's also used to refer to nearly all types and techniques of decorative plaster work by many decorators. In America, Venetian plaster refers to both pure slaked lime and lime plaster that has been modified with acrylic polymers. The latter type of plaster is quite durable, but a number of Venetian plasters that are sold in the large home improvement centers bear little resemblance to true Italian plaster. Some of those products may contain no marble or lime, which means they aren't really plasters at all. In fact, there are no American companies that make true Italian decorative plaster.
Regardless of the type of Italian decorative plaster you choose, it can be used to create some strikingly beautiful and dramatic effects when done correctly. Go online or visit your local decorative paint center and talk to a knowledgeable person about how to work with plaster and where it can be used to its fullest effect, and then you'll be ready to begin incorporating some of the elegant beauty and old world charm that this ancient technique can add to your home.
About Author:
See slides of Italian plaster finishes at http://DecorativePaintFinish.com
Copyright © 2008 Jeanette Fisher
Article Source: http://EzineArticles.com/?expert=Jeanette_Joy_Fisher
WallDreams brings you information you can use - when doing it yourself is the only way to go!
Subscribe to:
Posts (Atom)


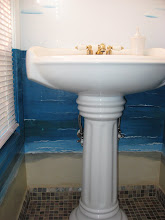
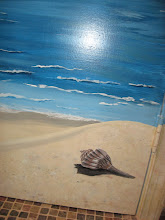
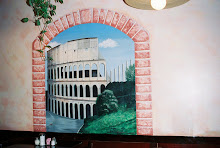


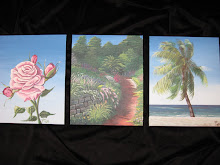

